Advice from Artists: 2016 Printmaker Survey Results

Are you a linocut printmaker? Or do you appreciate the art form? If so, you may be interested in this post.

In spring of this year I surveyed 50 linocut printmakers about their process and work (2016 Printmaker Survey Results). This detailed resource contains information about:

  • Linocut process (paper types, inks, carving tools, linoleum brands)
  • Artist profiles of 35 linocut printmakers
  • Advice from artists

This last section could be my favourite. It includes gems like:

Don’t start an art career trying to make work that will sell. You’ll never be happy and your heart won’t be in it. The audience for your art is out there, you just have to be patient and diligent in finding it

Take time to prepare properly, have patience in your work

Every perceived failure is just another step in the learning process. Keep going and don’t let failures slow down your progress

Thank you so much to all the artists who participated!

All the best,

Sophie


Muddling Through: Perseverance in Art-making

Test-EarlyDays2

The Good Old Days – One Of My First Prints

Well. I’ve smacked into a metaphorical wall.

For two years I have been flowing happily along, thrilled with carving and printing.

In the print of Mount Robson shown above – one of my first – I was so charmed by the process that I embraced and loved all of the little inconsistencies.

Sure, as I continued there were little signs of trouble – that oily halo on that one series of prints, or that top layer of ink that never seemed to fully dry. But mostly I ignored these things and eagerly moved on to each new print.

Test-strips

Testing Charbonnel and Akua Inks on Three Paper Types

Now that I’m considering opening an Etsy shop, I’m suddenly experiencing a strong desire to figure out the technicalities. If I’m selling a print, I need to be as confident in its structural qualities as I am in the image itself.

This is a good thing!

It does feel a little bumpy, though. I’ve left the euphoric delirium of new love and arrived at the place where it feels a little like work. And like any relationship, this one is unique and requires experimentation to successfully navigate. What has worked for others may or may not work for me, so I will need to do some first-hand research.

Test-Deer

Testing, Testing – Oh Deer!

Right now, there are a number of tests happening and planned in my studio. For one single-colour print (the deer skull shown), I’m trying (on Stonehenge paper):

  • Akua Intaglio Mars Black
  • Akua Intaglio Carbon Black
  • Daniel Smith Water Soluble Lamp Black
  • Caligo Safe Wash Relief Ink in Black
  • Akua Intaglio Carbon Black with Akua Mag Mix
  • Akua Intaglio Carbon Black with Kama Cobalt-Zirconium Dryer

To be honest, this experimentation is not my favourite thing. I would rather just get on with drawing and carving something new. But I’m in it for the long run. I can’t run away or ignore the bits that aren’t working. Now is the time to fight and persevere and muddle forward.

“The best way out is always through” – Robert Frost

Sweet Succulent Linocut Print

Yesterday was a fantastic day in the studio. I’m still waiting for the ink to dry on my big mountain print, but I completed a run of these sweet little cacti. The print below was created using the reduction, or suicide, method of printmaking. Read on to learn more!

Blog Cactus 4

Sweet Succulent Hand-pulled Linocut Print

It starts with a little drawing I’d made of a cute cactus plant on my windowsill. I make a tracing of it, and decide to try the reduction method to create the print. What’s that?

Normally, I carve a different block for each colour of a print. In the reduction method, you re-use the same block for every colour. You first carve away only the parts that will stay white, then print your lightest colour. Then using the same block, you carve away the parts that will stay the lightest colour, then print the next colour, and so on. It’s called the “suicide” method because you can’t go back – once you’re done, your block is destroyed.

Here are some initial colour tests, and the first layer of pale green on the lower right. My fingers are crossed that everything lines up next time!

Blog Cactus 1

Drawing, tracing and first layer of the linocut print

Next, I carve away all the parts I want to stay light green. I then choose to print the terra cotta colour of the pot – so I ink up only the bottom part of the block, and print overtop of the green.

Blog Cactus 2

Second layer of the print

Next, I decide the pot needs a bit more shading. I carve away the edges of the pot where the sun is casting some light, and print a deeper shade for the shadowed side of the pot. So far, everything seems to be lining up!

Blog Cactus 3

Second layer of the terracotta pot

Now, I carve away the entire terracotta pot, until all I’m left with is the dark green stripes of the leaves. Holding my breath, I ink up the block, line up my paper one more time, and hope that everything lines up…

And it does! Success! And what a sweet little print at 5 x 7″. Hooray!

(And, I clearly need a scanner, so I don’t have to rely on my phone to take these photos.)

Blog Cactus 4

Sweet Succulent: The final print

The print was made using Akua Intaglio inks (transparent base, burnt sienna, ultramarine blue, hansa yellow and a little phthalo blue) and printed on Stonehenge 100% cotton paper.

Thank you for reading!

The Making of a New Print: Part 1

Isn’t it fun to see how artists create their work? I always love when artists show just how they create their beautiful pieces. It usually gives me a much deeper appreciation for the high degree of care they put into their work. Linda Cote is a great example, I’ve learned so much from her posts.

The print I’m showing below is evolving right now, in my studio, so you are watching as it comes together! The final print will be on 9×12 inch paper.

0process

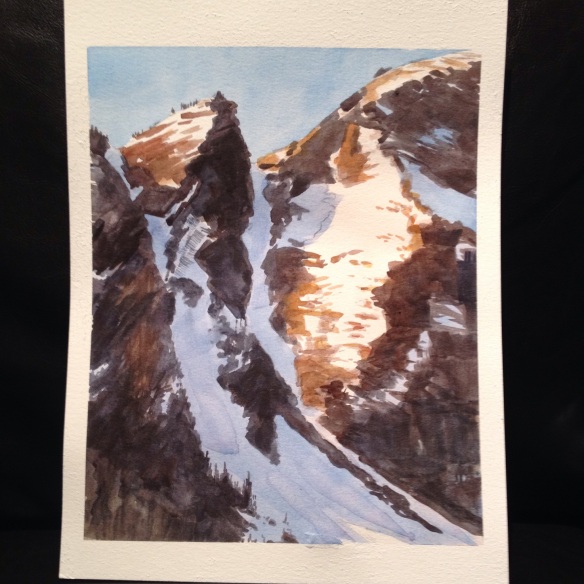
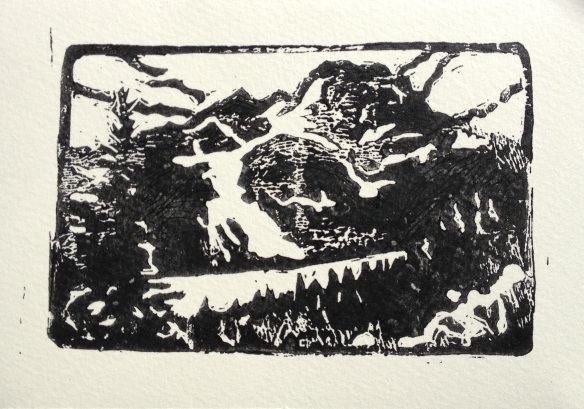
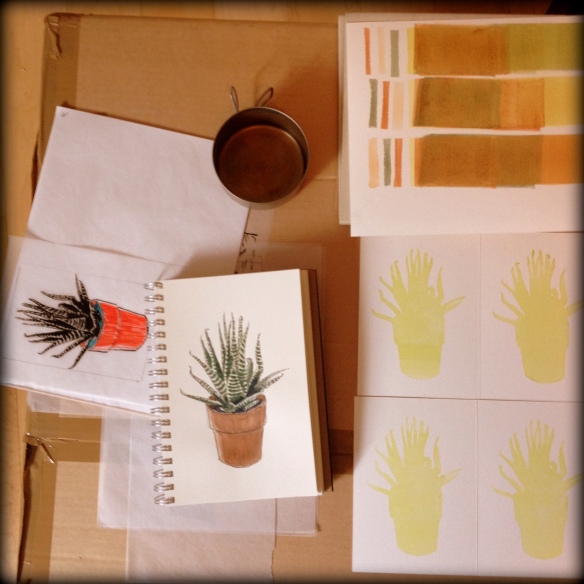
Watercolour sketch about to be turned into a linocut print

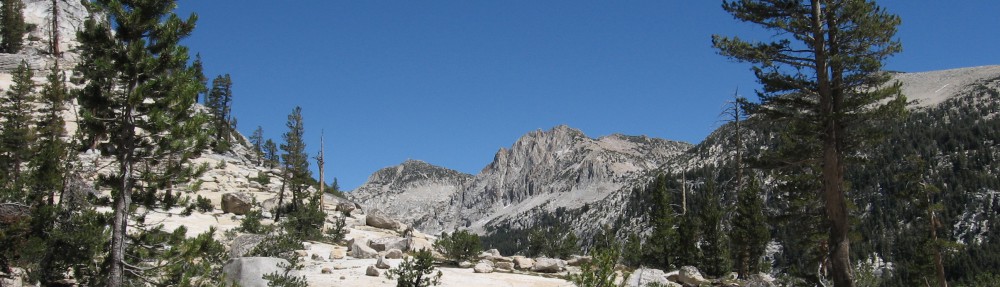
First, I create a sketch with watercolour. This one is based on a photo I took while backpacking in Olympic National Park. I love the design, so I’m confident enough to invest the many hours it will take to create the final print.

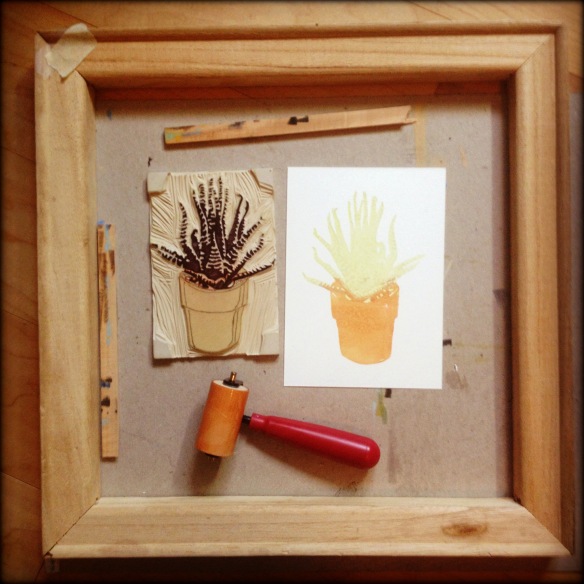
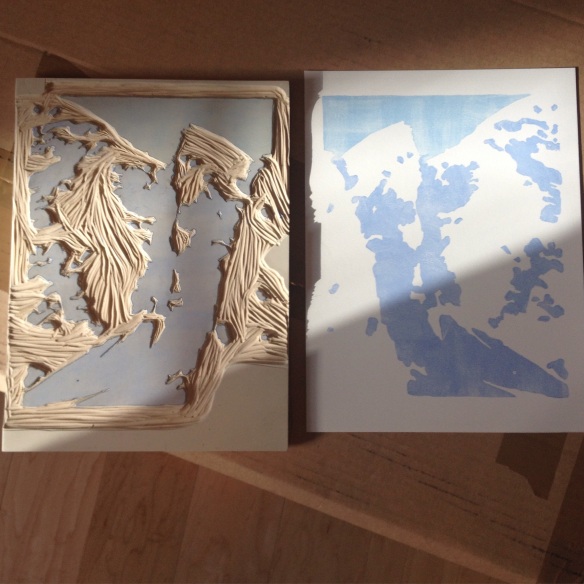
At this point, I create a more tightly rendered version of the drawing, showing each layer exactly as I will cut them. The photo below shows this drawing on the left, and stage 1 of the print on the right.

For the blue layer, I trace this drawing carefully in pencil, marking each place where I want blue ink to show. I then flip this paper over onto my rubber block and rub it with the back of a spoon until the drawing is transferred to the block. It’s ok if my blue layer overlaps the dark layer a bit, because the dark will go on top.

I then carve away all of the areas where I don’t want blue pigment. This takes many hours for a complex print. I love this part – carving deep grooves into the rubber, following the curves of the mountain with my knife – this effort makes me feel deeply connected to both the landscape and the final print.


1process

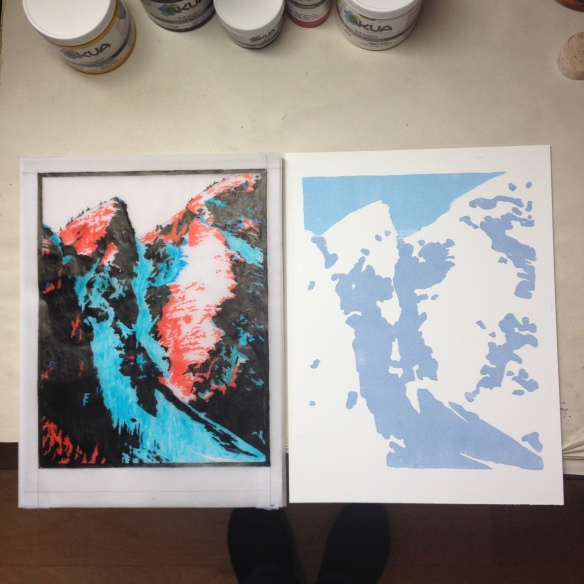
Drawing on the left, print in progress on the right

Next, I mix my inks. I use Akua water soluble inks. These are environmentally friendly soy based inks that clean up with water – no need to use solvents. They also do not contain toxic pigments like cadmium (heavy metal found in oil and acrylic paints), which is great, because I’m absentminded and sometimes end up with ink where it doesn’t belong.

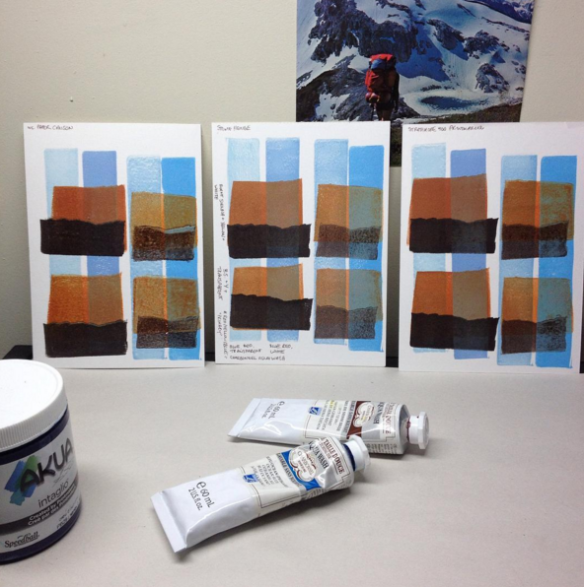
For my blue layer, I’d like a paler, more intense blue for the sky, and a warmer, darker, more purple blue for the snow in the shadows.

2process

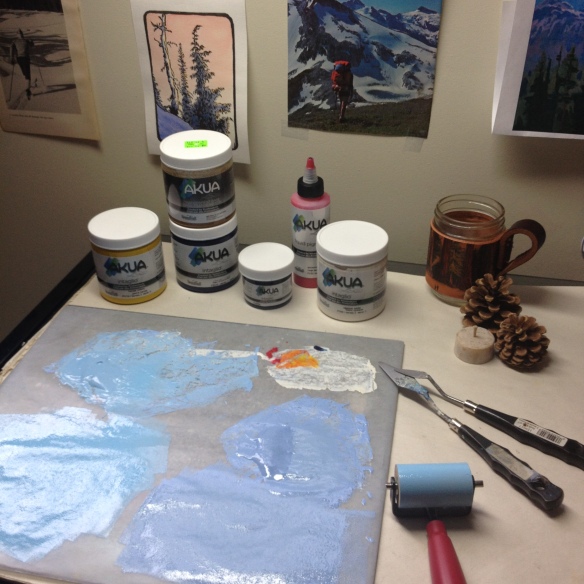
Mixing up just the right shades of blue

Next, I roll the ink out onto my block using a brayer (the thing that looks like a mini paint roller). The photo below shows the inked up block, ready for printing.

3process

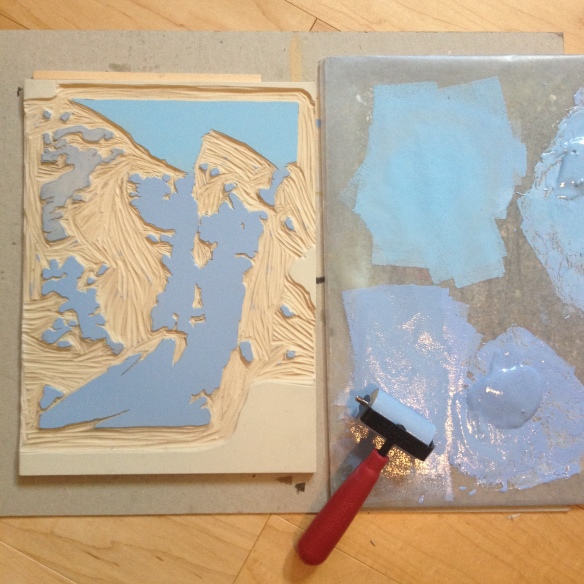
Rolling the ink onto the block

Now, I carefully lay my paper face down onto the inked block. Because I will have three separate blocks, it’s very important that I line everything up exactly right. I use a frame from an old canvas. I place the small block of wood on top of everything, and stand on it! I then move it around, so that I’ve stood on top of the whole print, ensuring an even transfer of ink to the paper.

4process

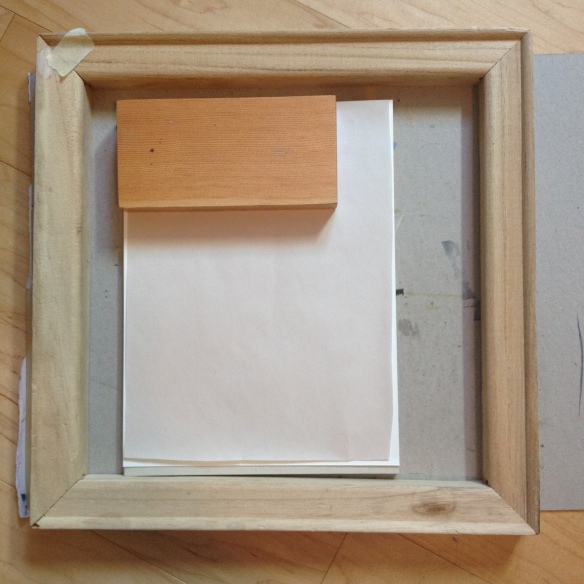
Pressing the paper into the inked block

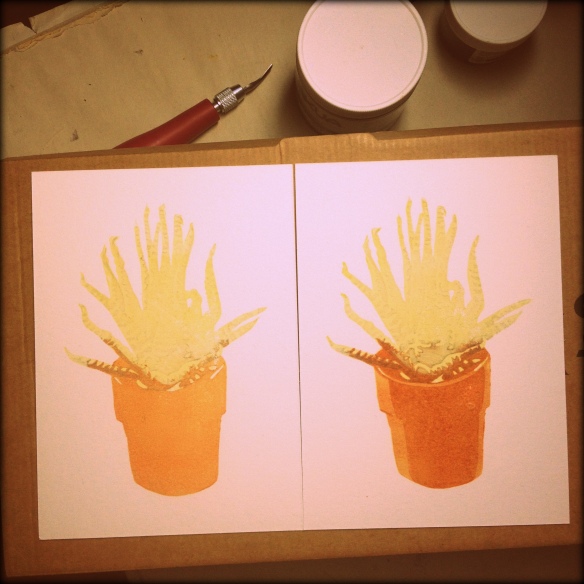
After this is complete, I carefully peel the paper off of the block, revealing the print. This is a thrilling part of the process- I get to see if it worked! At this point, I make any final adjustments to the block and ink colour, and continue printing multiple copies.

5process

Print after it has been pulled off of the block

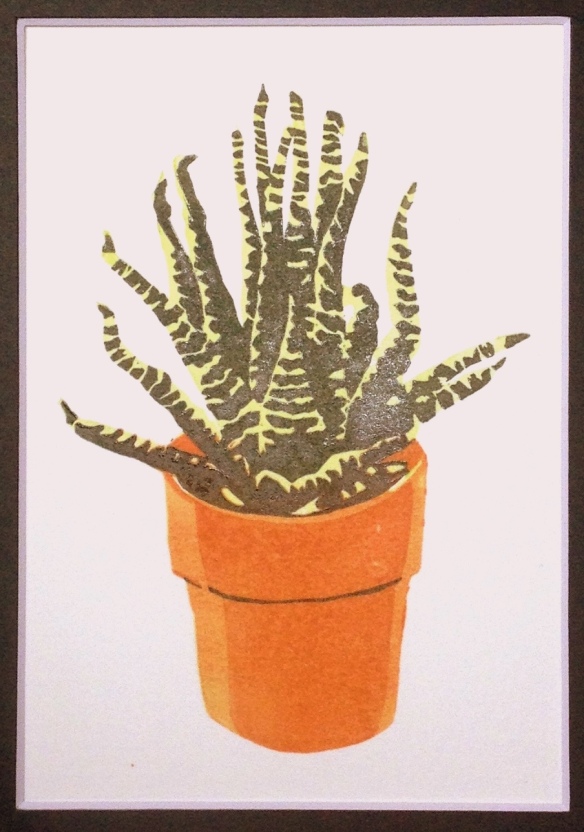
So there it is – my process for creating linocut prints.

This one has two detailed layers to come. Click here for Part 2!