Muddling Through: Perseverance in Art-making

Test-EarlyDays2

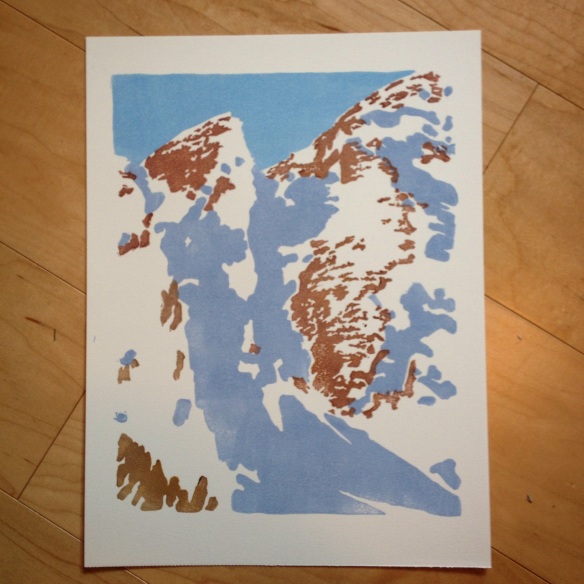
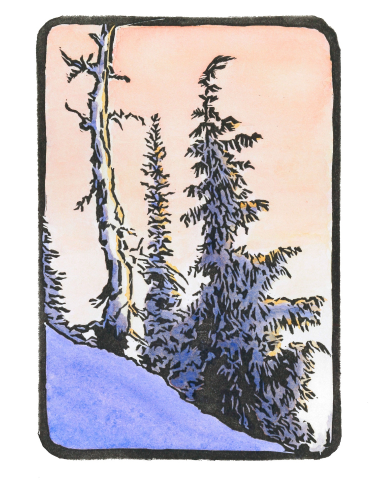
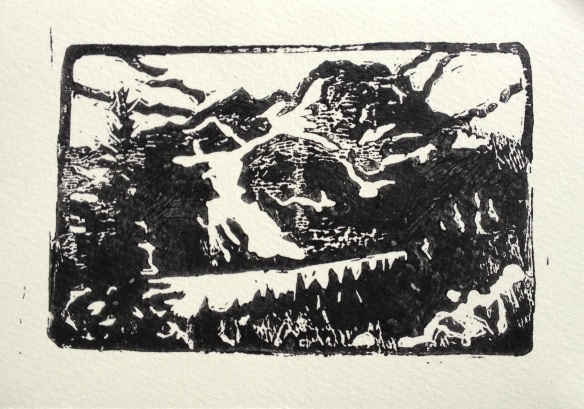
The Good Old Days – One Of My First Prints

Well. I’ve smacked into a metaphorical wall.

For two years I have been flowing happily along, thrilled with carving and printing.

In the print of Mount Robson shown above – one of my first – I was so charmed by the process that I embraced and loved all of the little inconsistencies.

Sure, as I continued there were little signs of trouble – that oily halo on that one series of prints, or that top layer of ink that never seemed to fully dry. But mostly I ignored these things and eagerly moved on to each new print.

Test-strips

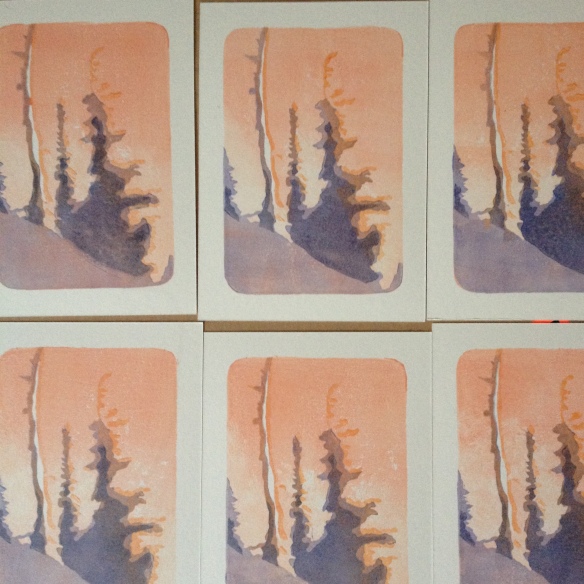
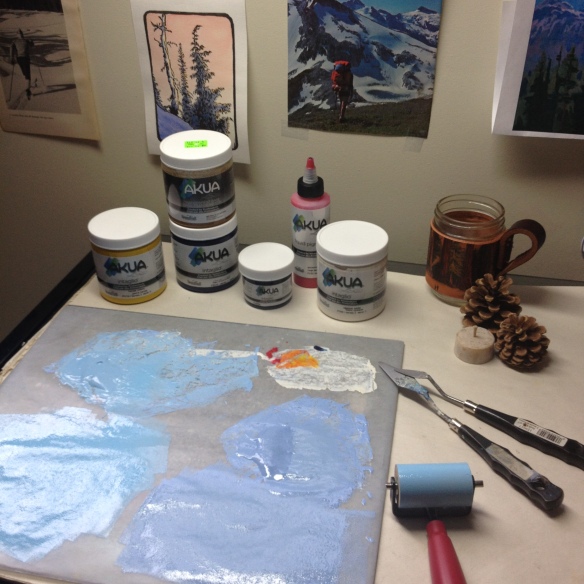
Testing Charbonnel and Akua Inks on Three Paper Types

Now that I’m considering opening an Etsy shop, I’m suddenly experiencing a strong desire to figure out the technicalities. If I’m selling a print, I need to be as confident in its structural qualities as I am in the image itself.

This is a good thing!

It does feel a little bumpy, though. I’ve left the euphoric delirium of new love and arrived at the place where it feels a little like work. And like any relationship, this one is unique and requires experimentation to successfully navigate. What has worked for others may or may not work for me, so I will need to do some first-hand research.

Test-Deer

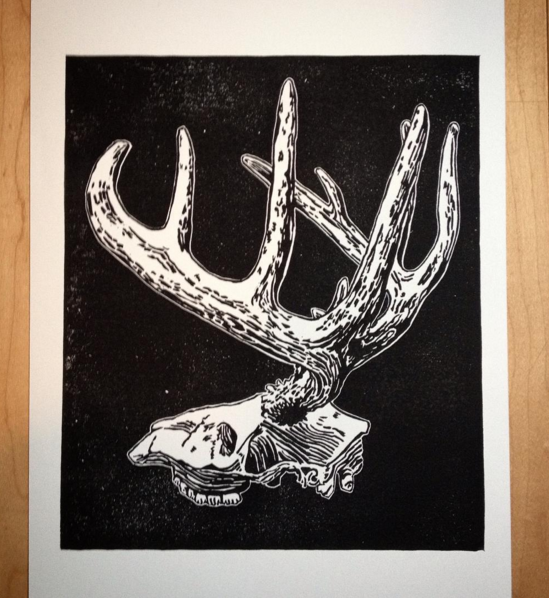
Testing, Testing – Oh Deer!

Right now, there are a number of tests happening and planned in my studio. For one single-colour print (the deer skull shown), I’m trying (on Stonehenge paper):

  • Akua Intaglio Mars Black
  • Akua Intaglio Carbon Black
  • Daniel Smith Water Soluble Lamp Black
  • Caligo Safe Wash Relief Ink in Black
  • Akua Intaglio Carbon Black with Akua Mag Mix
  • Akua Intaglio Carbon Black with Kama Cobalt-Zirconium Dryer

To be honest, this experimentation is not my favourite thing. I would rather just get on with drawing and carving something new. But I’m in it for the long run. I can’t run away or ignore the bits that aren’t working. Now is the time to fight and persevere and muddle forward.

“The best way out is always through” – Robert Frost

Printmaker Profile: Dave Lefner

Dave Lefner is a linocut printmaker from Los Angeles. He has been creating prints for over 20 years and has built up a stunning body of work.

You can find his website here, and you can watch a wonderful video here where he takes you on a tour of his studio and shows you his creative process, step by step.

DaveLefner-Palace

Dave Lefner’s Reduction Linocut “The Palace”

My favourite aspect of his prints is how well he captures the strong California light. I love California and its artists (William Rice, Edgar Payne and Frances Gearhart come to mind); if I were American I would move there in a heartbeat. Dave’s prints spark that longing and cool air and lonesomeness – a feeling akin to having stayed out in the sun a little too long.

DaveLefner-TBird

Dave Lefner’s Reduction Linocut “T-bird”

Dave was gracious enough to fill out my relief printmaker survey describing the elements he uses to create these beautiful works!

DaveLefnerTable

A huge thank-you to Dave for allowing me to share his process.

***********************************************************************

A note about printmaker profiles:

As a relative beginner to the art of linocut printmaking, I’m starting to understand just how much the technical aspects affect the final print. One can choose to print on tissue-thin or thick as cardstock paper. There are many brands of ink available. Some print on dry paper, others mist their paper with water first. Some use a press, others burnish the back of each print by hand while it sits on the inked block.

As artists, we get to experiment! Yet, some combinations work better than others, and I’d like to know what those are. So I’ve put together a (15 minute) survey, asking printmakers to pick one print and describe the technical details of its creation.

My goal is 100 responses! Then I will summarize the results here for you.

Are you a linocut printmaker? Take the survey here!

The Making of a New Print: Part 2

For Part 1 of this post, click here.

Finishing a print brings strange feelings sometimes. During the creating process, there’s a sense of hope and joy and optimism – a falling in love with what could be, akin to those thrilling first few dates with someone new.

But then, once the print is finished, it is like being catapulted into your fifth year of marriage. Suddenly the shine and freshness has rubbed off, and you are left to look, unflinchingly, at the reality that remains. Invariably, as with all aging processes, you see both deep beauty and emerging flaws. The ratio depends as much on the care you took in getting to this moment as your sunny or cloudy state of mind.

In Part 1 of this post, I described the first stage of this print – carving the lino block and printing the blue sky and snow. Next, I carved and printed the sun-splashed rocks.

photo 1

Mountain Linocut Print – Watching Ink Dry

I waited for a week while the ink layers dried, yearning to print the final layer more each day.

Finally, the weekend came and the first ink layers were dry. Time to print again! I spent an hour mixing and testing the perfect shade for the shadowed rocks: a mix of Burnt Sienna, Ultramarine Blue and Mars Black.

photo 2

Final Linocut Block Inked and Ready To Print

With my pulse racing, I got ready to print this final layer. I was nervous! Would everything line up? Would it turn out the way I envisioned?

And voila – the final print!

photo 3

The Completed Print

I am very happy with how it turned out. I love the sense of light and the warm-cool feeling of a sunny spring day.

And yet.

Remember that marriage analogy? When I first pulled this print off the block, I saw some flaws and could not “un-see” them. There are improvements to be made. I love this print enough to continue working with it, to give it the full and loving attention it deserves.

photo 5

New Linocut Block Prepared For Carving

And so, the journey starts again.

Thank you for reading,

All the best to you.

Sophie


Creative Projects Make Their Own Timing

Creative projects have timelines of their own. They can rarely be forced to enter the world, and sometimes a good deal of faith is required to wait for them to be born.

Take this print, for example. I started working on this a year ago. I carved the linoleum block for the black ink, then printed this. Then I tried hand-watercolouring the black-and-white print (shown in the image).

Three+Trees+(Winter)

Three Trees (Winter)

I love how it looks, except the paper warped and buckled with the water, and would not become flat again.

I knew I wanted to complete this as a multi-colour relief print, so it would stay lovely and flat when framed. Yet for a long there was some block I couldn’t get beyond. I hung this first version on my clothesline, and waited and waited and worked on other things.

Then, the other day, I finally felt a wave of energy. Over a few days I carved and printed the first four layers (shown below).

Now, I am waiting for the ink to fully dry before I can lay down that final, rich black on top. And the funny thing is, even though I let it sit for a year, I can hardly wait!

I think there’s a lesson somewhere in here, about persistent and active patience. We know when we’re procrastinating. At those times, we know what the next step is, although we can’t make ourselves take it. But there are other times when we can’t see the path ahead.

In these times, I think our job is to remain open. To keep listening. We are slowly collecting know-how and new information. When we are ready to move forward, that quiet, tender voice inside of us will let us know.

Three-Trees-In-Progress

Four layers down on Three Trees (Winter) linocut print

Have a lovely week, my friend, and thank you for reading.

-Sophie

The Making of a New Print: Part 1

Isn’t it fun to see how artists create their work? I always love when artists show just how they create their beautiful pieces. It usually gives me a much deeper appreciation for the high degree of care they put into their work. Linda Cote is a great example, I’ve learned so much from her posts.

The print I’m showing below is evolving right now, in my studio, so you are watching as it comes together! The final print will be on 9×12 inch paper.

0process

Watercolour sketch about to be turned into a linocut print

First, I create a sketch with watercolour. This one is based on a photo I took while backpacking in Olympic National Park. I love the design, so I’m confident enough to invest the many hours it will take to create the final print.

At this point, I create a more tightly rendered version of the drawing, showing each layer exactly as I will cut them. The photo below shows this drawing on the left, and stage 1 of the print on the right.

For the blue layer, I trace this drawing carefully in pencil, marking each place where I want blue ink to show. I then flip this paper over onto my rubber block and rub it with the back of a spoon until the drawing is transferred to the block. It’s ok if my blue layer overlaps the dark layer a bit, because the dark will go on top.

I then carve away all of the areas where I don’t want blue pigment. This takes many hours for a complex print. I love this part – carving deep grooves into the rubber, following the curves of the mountain with my knife – this effort makes me feel deeply connected to both the landscape and the final print.


1process

Drawing on the left, print in progress on the right

Next, I mix my inks. I use Akua water soluble inks. These are environmentally friendly soy based inks that clean up with water – no need to use solvents. They also do not contain toxic pigments like cadmium (heavy metal found in oil and acrylic paints), which is great, because I’m absentminded and sometimes end up with ink where it doesn’t belong.

For my blue layer, I’d like a paler, more intense blue for the sky, and a warmer, darker, more purple blue for the snow in the shadows.

2process

Mixing up just the right shades of blue

Next, I roll the ink out onto my block using a brayer (the thing that looks like a mini paint roller). The photo below shows the inked up block, ready for printing.

3process

Rolling the ink onto the block

Now, I carefully lay my paper face down onto the inked block. Because I will have three separate blocks, it’s very important that I line everything up exactly right. I use a frame from an old canvas. I place the small block of wood on top of everything, and stand on it! I then move it around, so that I’ve stood on top of the whole print, ensuring an even transfer of ink to the paper.

4process

Pressing the paper into the inked block

After this is complete, I carefully peel the paper off of the block, revealing the print. This is a thrilling part of the process- I get to see if it worked! At this point, I make any final adjustments to the block and ink colour, and continue printing multiple copies.

5process

Print after it has been pulled off of the block

So there it is – my process for creating linocut prints.

This one has two detailed layers to come. Click here for Part 2!


Too Tired to Make Art?

How to be gentle but firm with yourself

Cameron Pass

Cameron Pass (5×7 Relief Print)

Last night I came home after work and found myself too tired to make art. I flopped down on my bed and lay there for an hour, staring glazed-eyed into Twitter and wondering what was wrong with me that I couldn’t make myself go into the studio.

Reading art blogs, it’s easy to get the idea that other artists are brimming with constant creativity and are whistling while they work long into the night. When I’m in a bit of a slump, I compare myself to their online personas, and start to worry that if I don’t play cruel taskmaster to myself, I will get lazy and unmotivated stop making art altogether.

Here’s how I tackled this beastly sequence of thoughts:

First, I was gentle. I acknowledged that I have some good reasons for being tired (two additional hours of exercise each day, a recently completed commission for the largest print I’ve made to date, recent technical challenges with some prints).

Then, I was firm. I reasoned that, despite being tired, I could take a small step in service of creativity. I stepped into the studio and committed to just staying there and keeping busy – anything qualified, as long as I could honestly say it would keep my art moving forward. I ended up using the time for administrative tasks – signing prints and cleaning, readying the studio for another burst of creative inspiration.

Finally, I was gentle again. I accepted that this was “enough work” for the day (this was the hardest part) and reminded myself that life and art is neither a marathon nor a sprint, but both, replete with injuries and triumphs and all of the other ups and downs inherent in any worthwhile endeavour.

The gentle-firm-gentle sandwich – it worked for me, and tasty, too. Maybe it can work for you!

Wishing you happiness in all your worthwhile endeavours.

Sophie